
Organizing your photos.
The easiest tool to organize your photos by editing metadata and by managing the location of your photos on your harddisk.
Nederlandse uitleg
|
Organizing your photos.The easiest tool to organize your photos by editing metadata and by managing the location of your photos on your harddisk. | Nederlandse uitleg |

 The current photo you are working with.
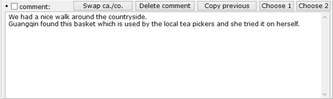 This editfield is for the comment or the caption of the photo. Which one you use here depends upon the setting in the user settings dialogbox.
The other one is placed in the other fields section.
This editfield is for the comment or the caption of the photo. Which one you use here depends upon the setting in the user settings dialogbox.
The other one is placed in the other fields section. 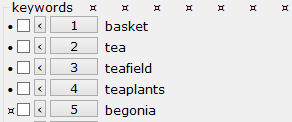 There are 20 fields for keywords available. Each field has (1) a notification character, (2) a checkbox, (3) an undo button, (4) a numbered choose button and (5) the keyword itself.
| (1). The leftmost item is the notification character. There are three possibilities here: | |
| • : | The keyword you see on the screen is the same as the keyword which was read in the photo. If you write now to the photo, this field is left unchanged. |
| ¤ : | What you see on the screen is different from the keyword which was read in the photo. If you write now to the photo, this field is changed. |
| : | If this field is empty, there is no keyword on the screen and there was no keyword read in the photo. If you write now to the photo, this field will remain empty. |
 Choosing items from a list can save you a lot of typing and prevent errors. It is also easy to see which words you have used before, to keep the whole system more consistent.
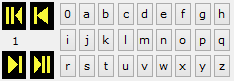 By clicking on the button 0 you go to the beginning of the list. By clicking on any of the other alpabetically ordered buttons, you go to the part of the list which starts with that letter.
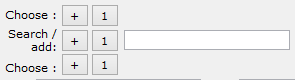 Typing in the editfield of search / add creates a new entry in the list if it does not yet exist in the list. Just above and below that field 2 existing entries in the list are shown,
which are the words which are alphabetically just before and just after the new entry. Clicking on one of the three buttons, marked with 1 just left of these keywords chooses that entry
and brings you directly back to the main screen. And by clicking on the buttons, marked with + adds that keyword to your photo, but you stay in the keywords section to choose more keywords.
All keywords you use are added to the current list if it does not yet exist in that list and it is also added to the last list with the name all.
Typing in the editfield of search / add creates a new entry in the list if it does not yet exist in the list. Just above and below that field 2 existing entries in the list are shown,
which are the words which are alphabetically just before and just after the new entry. Clicking on one of the three buttons, marked with 1 just left of these keywords chooses that entry
and brings you directly back to the main screen. And by clicking on the buttons, marked with + adds that keyword to your photo, but you stay in the keywords section to choose more keywords.
All keywords you use are added to the current list if it does not yet exist in that list and it is also added to the last list with the name all.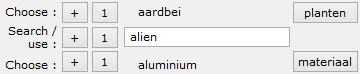 In the keyword list all you can search for a word, just like in the other keyword lists. And to the right of each of the 2 words which are alphabetically closest to the search
word above and below the word you are searching for you see a button. With that button you can jump to the keyword list which contains that word, but you can also choose that word directly, just as
in the other keyword lists. You can choose the word you have just typed in the editbox, but that word will not be saved in the list.
In the keyword list all you can search for a word, just like in the other keyword lists. And to the right of each of the 2 words which are alphabetically closest to the search
word above and below the word you are searching for you see a button. With that button you can jump to the keyword list which contains that word, but you can also choose that word directly, just as
in the other keyword lists. You can choose the word you have just typed in the editbox, but that word will not be saved in the list.
 In the keyword list you can directly create new keywords by typing in the editboxes. By clicking on the button with a 1 on it, you choose the keyword in the editbox just to the right
of that button. By clicking on a button with a + sign on it, you choose the keyword in the editbox and you can immediately choose more keywords to add. In that case, you see a new
little window on top of the photo in which all chosen keywords are shown.
In the keyword list you can directly create new keywords by typing in the editboxes. By clicking on the button with a 1 on it, you choose the keyword in the editbox just to the right
of that button. By clicking on a button with a + sign on it, you choose the keyword in the editbox and you can immediately choose more keywords to add. In that case, you see a new
little window on top of the photo in which all chosen keywords are shown.
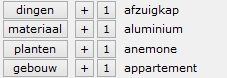 The keyword list all is a bit special. It will contain all items from all the other lists. You cannot add an item directly in this list. But with the buttons + and
1 you can choose an item of the list or you can jump to one of the other lists by clicking on the named buttons at the left of the specified keyword.
The keyword list all is a bit special. It will contain all items from all the other lists. You cannot add an item directly in this list. But with the buttons + and
1 you can choose an item of the list or you can jump to one of the other lists by clicking on the named buttons at the left of the specified keyword.
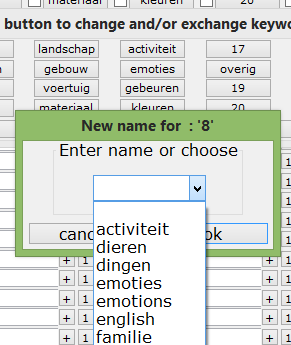 The edit list names button lets you edit and/or re-order the names of the lists. The names of the 27 editable lists are shown on buttons again. The name of the list all
cannot be changed.
The edit list names button lets you edit and/or re-order the names of the lists. The names of the 27 editable lists are shown on buttons again. The name of the list all
cannot be changed.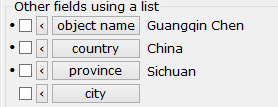 These lists also has 5 items each, just like the keyword lists (Click here for that explanation).
But now you have only one list for each item and the entries in the lists can be a bit longer.
These lists also has 5 items each, just like the keyword lists (Click here for that explanation).
But now you have only one list for each item and the entries in the lists can be a bit longer.
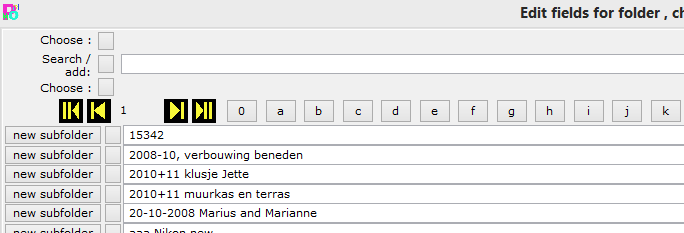 Only the last one folder is a bit different. This entry can be much longer and in the folder list you have an extra column with buttons new subfolder.
Clicking on any of these buttons let's you add a new subfolder to the relative folder path by copying that folder path to the editbox at the top of the window.
There you can edit the name and choose to use it with the button at it's left.
Only the last one folder is a bit different. This entry can be much longer and in the folder list you have an extra column with buttons new subfolder.
Clicking on any of these buttons let's you add a new subfolder to the relative folder path by copying that folder path to the editbox at the top of the window.
There you can edit the name and choose to use it with the button at it's left.
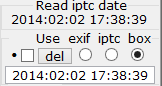 A digital camera usually writes the date and time when the photo was taken in the EXIF metadata. Here you can see which IPTC time is read in the photo
(In this example it is 2014:02:02 17:38:39.) If there is no IPTC date in the photo this field is left empty.
A digital camera usually writes the date and time when the photo was taken in the EXIF metadata. Here you can see which IPTC time is read in the photo
(In this example it is 2014:02:02 17:38:39.) If there is no IPTC date in the photo this field is left empty. 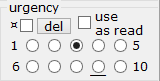 The urgency of the photo is a number from 1 to 10 which can be directly chosen by clicking on a radiobutton. The urgency which is read in the photo is shown as a
line beneath the radiobutton.
The urgency of the photo is a number from 1 to 10 which can be directly chosen by clicking on a radiobutton. The urgency which is read in the photo is shown as a
line beneath the radiobutton. The biggest button on the screen. The text on the button tells you whether you are working directly in the original photos or whether you are creating copies of the photos.
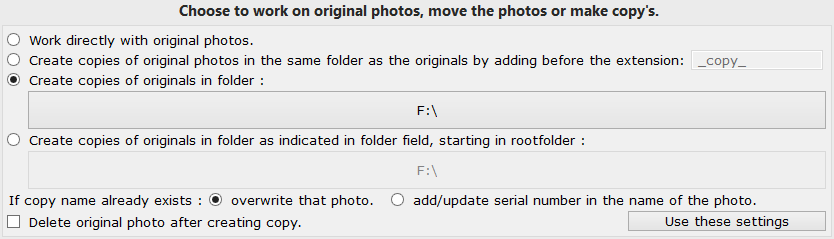
 This option will create copies of the photo in the folder you specify here by clicking on the button.
All text fields will be written in this copy of the photo who will get the same filename as your original photo.
This option will create copies of the photo in the folder you specify here by clicking on the button.
All text fields will be written in this copy of the photo who will get the same filename as your original photo.
 This option will create a copy of the photo, starting from the folder you specify here, in the folder you specify in the folder field.
 While you are browsing through a folder, you may want to change something in the current photo which is not possible with photo organizer, like changing the colours or adjust the contrast.
This is made possible by 'connecting' these 2 buttons each to another program of your choice. In this example, the top button will open the current photo in photo viewer. The other button is not
yet connected to another program. By clicking on it, you open a dialogbox in which you can choose a program with which you want to open the current photo by clicking on this button. You can always
choose another program to connect to with these buttons in the user settings dialogbox.
While you are browsing through a folder, you may want to change something in the current photo which is not possible with photo organizer, like changing the colours or adjust the contrast.
This is made possible by 'connecting' these 2 buttons each to another program of your choice. In this example, the top button will open the current photo in photo viewer. The other button is not
yet connected to another program. By clicking on it, you open a dialogbox in which you can choose a program with which you want to open the current photo by clicking on this button. You can always
choose another program to connect to with these buttons in the user settings dialogbox.
 With the three buttons with blue arrows, you can rotate the current photo accordingly.
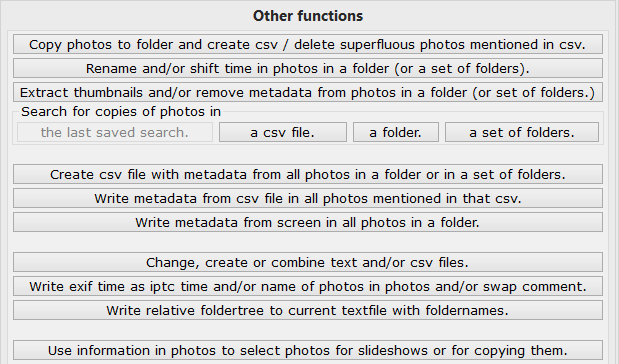 The other functions dialogbox is only a redirection to the actual functions. The text on the buttons is descriptive. By clicking on any of the buttons
on this dialogbox you go to the full description of that function.
The other functions dialogbox is only a redirection to the actual functions. The text on the buttons is descriptive. By clicking on any of the buttons
on this dialogbox you go to the full description of that function.
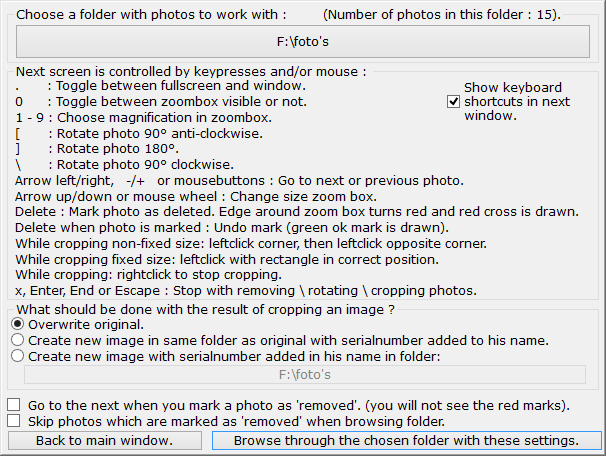 This dialogbox appears when you click on the Remove/rotate/crop photos in folder. button. At first you have to select the folder in which you want to work.
By clicking the button Browse through the chosen folder with these settings. you start to go through the folder of your choice. Then you can use the keyboard as is explained here.
This dialogbox appears when you click on the Remove/rotate/crop photos in folder. button. At first you have to select the folder in which you want to work.
By clicking the button Browse through the chosen folder with these settings. you start to go through the folder of your choice. Then you can use the keyboard as is explained here.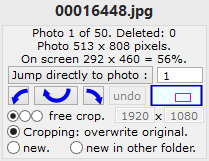 While you are browsing through a folder with photos, you see this little dialogbox. It tells you the name of the current photo, how many photos there are in that folder
and how many of them are marked as to be deleted. You see also it's size in pixels and it's size as it is shown on the screen.
While you are browsing through a folder with photos, you see this little dialogbox. It tells you the name of the current photo, how many photos there are in that folder
and how many of them are marked as to be deleted. You see also it's size in pixels and it's size as it is shown on the screen.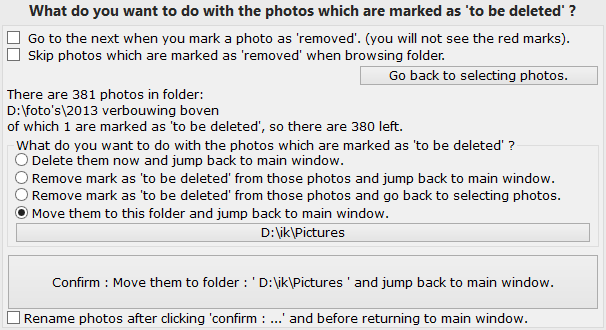 After pressing End, Enter or Esc or after you clicked the cross in the upper right corner of your window while you were browsing through a folder,
you get this dialogbox, but only when there are photos marked as to be deleted, oherwise you directly return to the main window.
After pressing End, Enter or Esc or after you clicked the cross in the upper right corner of your window while you were browsing through a folder,
you get this dialogbox, but only when there are photos marked as to be deleted, oherwise you directly return to the main window.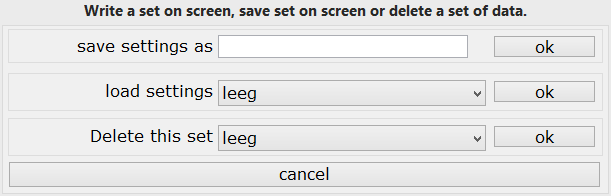 Here you have three choices:
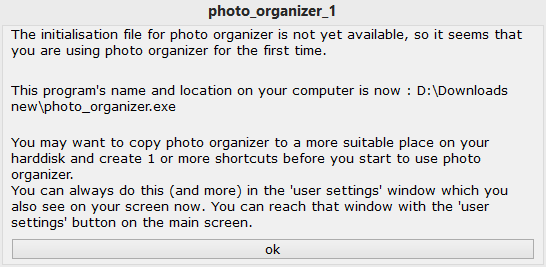 When you start the program for the very first time, it can't find his own initialisationfile (Which is the file in which Photo organizer writes all his settings
before it stops, so it knows where to continue next time.) Therefore the program shows you this window, on top of the user settings dialogbox, just as a little reminder
of what is logical to do at that moment.
When you start the program for the very first time, it can't find his own initialisationfile (Which is the file in which Photo organizer writes all his settings
before it stops, so it knows where to continue next time.) Therefore the program shows you this window, on top of the user settings dialogbox, just as a little reminder
of what is logical to do at that moment.
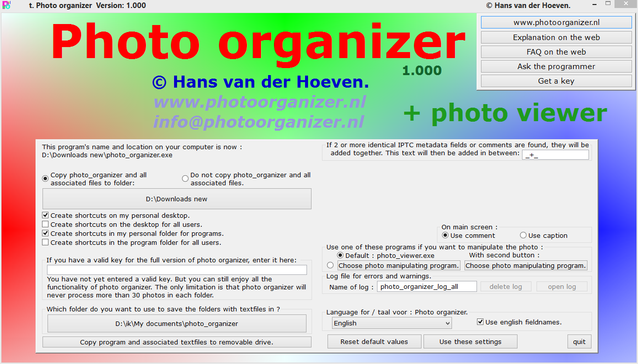
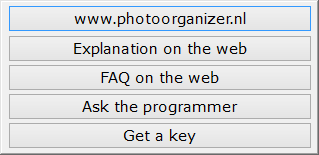 In the upper right corner of the window you see these 5 buttons which link you directly to the relevant pages on the website.
 The program does need a location to store the lists with keywords and other lists. It chooses a location for you, in this case F:\ because the program
was run from an USB stick which used F as it's drive letter. But if you run the program from your harddrive in your computer, it will choose the
my documents folder as the default. You can choose whatever writable folder you want to use by clicking on this button or you can simply accept the suggested default location.
The program does need a location to store the lists with keywords and other lists. It chooses a location for you, in this case F:\ because the program
was run from an USB stick which used F as it's drive letter. But if you run the program from your harddrive in your computer, it will choose the
my documents folder as the default. You can choose whatever writable folder you want to use by clicking on this button or you can simply accept the suggested default location.
 Here you can choose with which program to open the current photo if you click on the open photo with ... buttons on the main screen. In this example, the first button is
linked to the default program photo viewer and the second button is linked to irfanview, which is also a great program to work with while showing or working with photos. See
www.irfanview.com for more details about that program.
Here you can choose with which program to open the current photo if you click on the open photo with ... buttons on the main screen. In this example, the first button is
linked to the default program photo viewer and the second button is linked to irfanview, which is also a great program to work with while showing or working with photos. See
www.irfanview.com for more details about that program.

| Hans van der Hoeven Liesbospark 28 4813 HV Breda The Netherlands |
Program explanation FAQ |
home Contactform Get a key |
mail:info@photoorganizer.nl © 2015, Hans van der Hoeven URL: www.photoorganizer.nl |
| © HHdesign. | Webmaster: HHdesign. |